


We recently spent a few days at the Mohonk Mountain House in New Paltz, NY to demonstrate a couple of holiday workshops for their guests and I have to share what a unique experience the Mohonk Mountain House offers people. The history, the spectacular views, the accommodations, the festivities and all of the interesting people make it one of the most relaxing, magical places I’ve visited recently. If you’re ever looking for a peaceful, nature-filled escape from technology and the hustle and bustle of the city, Mohonk should be one of your destinations of choice. 


We arrived just in time for an ice storm, which made the views and the scenery all the more magical. We enjoyed afternoon teas, board games, and a spa visit that was unlike any other. There are no tv’s in the rooms, and each room is equipped with a wood burning fireplace, so the opportunities to unwind were even more plentiful. Due to the weather and the time of year, we didn’t get a chance to hike around the bluffs as we would have liked, but we can look forward to that experience during our next visit which we’ll be doing again in November. 2009 marks their 140th anniversary, so you can expect incredible events throughout the year. Sneak a peek here!
cheers!
michele.


Tuesday, December 30, 2008
tHe maGiC Of MoHonK moUnTaiN hoUsE
Sunday, December 21, 2008
Good Morning America, DIY Style
For all of you that caught us on GMA today, a big thanks for your support! If you missed it, you can check out the videos on www.goodmorningamerica.com. For instructions on the game tables, scarves, pop art portrait, pub/pilsner glasses, and dollhouse, check out their respective links below. The Pop Art Portrait as well as many other fun to do paint projects is featured in the Courage to Create with Paint DVD, so be sure to check that out in our online store as well.
No-Knit Scarves *Note: if you do not have a sewing machine, you can tie knots in the bundle or section off strands using ribbon or string. To change up the style, try braiding the body of the scarf.
Pub/Pilsner Glasses
*You will first want to clean the area of the glass with rubbing alcohol to ensure a tight seal with the paint and the glass. Simply using Liquitex's Glossies Enamel Paints, paint on desired image and let dry. Next, take the glass and place it into a cold oven, close the door and set to bake at 325 degrees for 45 minutes. Let glasses cool to the touch and drink proudly. (recommended to hand wash and dry)
*Note: for images that you would like to replicate, simply scale the image down and tape it to the inside of the glass and trace.
Cheers,
Michele
Thursday, December 18, 2008
Michele Beschen LIVE on Good Morning America
 **Date Change**
Michele Beschen celebrates 'handmade' holiday gifts LIVE on Good Morning America.
"Simply Michele, Inc. & Good Morning America"...
ABC News: 'Good Morning America'
New York, New York -- Sunday, December 21st, 8am EST
Van Meter, Iowa (December 18, 2008) How-To Hipster Michele Beschen of DIY Network and HGTV's B. Original, will appear on ABC News: 'Good Morning America' Sunday, December 21st to help share cool handmade holiday gift ideas.
Watch as she helps a family do something special for their 8 year old daughter this holiday season. The family isn't able to afford the gift she wants this year, so Michele shows them how they can make it themselves instead. Michele will also share some other creative handmade gift ideas that can be tailored to suit everyone on your list.
"The essence of everything I do is about inspiring people to live and work creatively. And let's face it, a creative approach to some of the more challenging times we're all facing right now with jobs and the economy is what pulls us through. I look at the holidays as a wonderful occasion to exercise that. Creative handmade gifts are not only budget-friendly, but they also give you the opportunity to give a gift that is even more thoughtful, more personal and all the more special" says Michele Beschen.
This episode of Good Morning America Weekend airs 8am EST Sunday, Dec. 21st on your local ABC station.
Thursday, November 27, 2008
chEers To a SweLL ThanKsGivInG!
Eat, Drink and B. Merry, my friends! Enjoy your family and friends and give a shout of thanks to each and every one of them!
Cheers to a festive, creative holiday!
michele
Friday, November 14, 2008
moUntAin of CreAtivE fuN

In a few short weeks we head to the picturesque Mohonk Mountain House in New Paltz, NY. I'll be offering up a couple of creative sessions (Dec 12-14) for their guests to come in and learn how to create 'no knit scarves' or how to paint a 'pop art portrait' of someone they love! Both are great fun and they make for colorful gift ideas. It's all part of their "Home for the Holidays - How To Holidays" program and we're very proud to be a part of it! (and shhhh!....I may even soak up a bit of the vaca-vibe for myself while I'm there!) 

Cheers!
michele
Monday, November 10, 2008
'sAy It wiTh a ScaRf'


“Beauty of style and harmony and grace and good rhythm depend on simplicity”…. Plato
Scarves can be celebrated in many magnificent ways. They can be stylish accessories, bundles of warmth, or works of art. Men, women and children can all get in on the celebration and they can be enjoyed year ‘round. Creating a one of a kind scarf from scratch is also an instantly gratifying project anyone at any skill level can take on. I love making them as much as I love wearing them. The unique handmade scarves I share with you are quick and easy to create and they each utilize leftover materials in a beautiful way.
No Knit
The No Knit Scarf is simply made by cutting strands of yarn to 8-foot lengths for adults and 4 to 5 foot lengths for kids. A medium weight scarf consists of 65 to 70 strands. (A helpful cutting jig can be made by taking an 8 foot long 2x4 and placing a long bolt at the appropriate measured points. Run yarn from one end of the board to the other wrapping around bolts as you go.) Vary the weights, textures and colors of yarn for an interesting end result. Once you have all of your strands cut to length, bundle and tie off at the center. Section off as desired and lock sections into place by sewing a straight machine stitch across the strands at the desired points. I like to place a stitch in the middle and then two more stitches out from the center on both sides spaced 8 inches apart. The remaining loose ends are then braided and machine stitched at the ends. Another option is to simply section your bundle off into three sections and braid the entire thing. Just tie off tightly at both ends and you’ve eliminated any need for sewing. Experiment with different sectioning techniques, twists, and braids and feel free to embellish with beads, charms or other decorative accessories, as desired. 

Quilt Scarf
Sewing together scraps of fabric in simple, quilt inspired patterns create this colorful beauty. You can also save yourself even more time by utilizing partially finished quilt squares that can generally be found at flea markets and second hand stores. Stitch together a section of fabric scraps until you have desired scarf length and width. Work on a cutting mat and trim to size as you go and press open the seams as you go. I make mine to a 72 to 75 inch length and vary the width anywhere from 6 to 12 inches. It’s all about personal preference. The backing material for the scarf can be soft, lightweight muslin or my personal preference is old cotton bed sheets. Backings for a lot of scarves can be created from one bed sheet. Search for vintage looking ones with interesting patterns to compliment the front piece you’ve created. Place wrong sides together and use a serger if you have one, to create a finished edge all the way around. You can also place right sides together, stitch ¼” from edge on three sides, leaving one short side unstitched in order to turn right side out and finish with a machine topstitch or hand stitch.
Trimmed Out
Select 3 – 4 different style trims. Cut each to desired scarf length. Lay out trims on a table and twist and overlap into desired style. Pin where needed and stitch to hold in place. 
T-shirt
Select old t-shirts with interesting logos and sayings and preferred color schemes. Place each shirt on a cutting mat and cut out a 12” square from the front and back of the shirt. Connect 8-10 panels together to get desired length. Use decorative zigzag or straight topstitch to connect. Your t-shirt material will not fray, so there is no need to finish off the outer edges of your scarf. 
Try them all and you’ll be able to wrap your neck and the necks of all your loved ones in stylish handmade fashion for a long time to come. And, whether you’re wearing them for warmth or wearing them for style, wear them proudly, my friends!
Cheers to the scarf!
michele.
Friday, October 17, 2008
'bAcK To BaSicS'


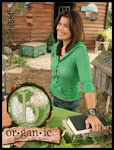
We recently wrapped up production for our b. organic series and while I’ve always been a nature buff with a strong conviction for ‘the basics’, this project has really left me with a renewed sense of health and energy. We’ve been celebrating nature and every facet of its’ natural goodness for several weeks and it’s reinforced the whole ‘back to basics’ conviction even more. Caitlin from Olivu in Sheboygan, Wisconsin visited recently to share some of her beauty product recipes and I’ve been an avid practitioner ever since. I would never have bothered squishing up overripe fruit from my frig and slathering it all over my face, but I have to tell you, it’s good stuff that works wonders for the skin and the soul. She shared some fabulous homemade beauty recipes and I look forward to sharing them with all of you. My other newfound ‘feel good’ is canning. I love to garden and I love fresh produce, but I’ve never done much preserving other than throwing some things in the freezer. For some reason I had it in my head that canning was going to be this big, messy ordeal that required truckloads of produce and was a tricky, complicated process. Boy, was I wrong. It’s incredibly easy. You can do small, manageable batches that don’t take any time at all. You can even take advantage of buying in bulk at wholesale clubs instead of totally having to rely on personal gardens and farmers markets which makes it accessible to everyone, anywhere, all year long. The end result is incredibly economical, healthy, and so delicious!
Doing a few of the ‘back to basics’ type things that a lot of us have gotten away from is incredibly rewarding. But.....you have to do it….to experience it. 


Cheers to the natural basics!
Tuesday, September 30, 2008
flEa MarKeT fuN


You never know what you’re going to haul home from a flea market. That’s what makes it such an exciting shopping adventure – the hunt, the unexpected discoveries, the cheap buys, the one of a kind treasures. My search list is never the same and sometimes you just let the day lead the way. I'm happy to report my recent trip to the Pecatonica Flea Market yielded vintage tools. I love having a variety of tools to work with because they really expand creative opportunities and possibilities. That being said, I want to be able to actually use the tools, not just have them sitting around as props, so when I’m able to find old ones that actually run good..Whoo! Hoo!

I scored a circular saw, a couple of jig saws, a scroll saw and some hand tools like a draw blade, a brass hammer, vises and a sweet pair of retro safety glasses.
All but one of the power tools run beautifully! The $1 jigsaw unfortunately has an electrical issue…the tape around the housing was a bit of a red flag, but as my husband always says… “if it’s man-made, I can fix it” – so, we’ll see!

Last trip, I hauled home a climatorium. Yes, a climatorium. Think aerogarden, only MUCH larger, MUCH more laboratory looking and well, interesting to say the least! 
My Aunt DeDe told me that I would have a lot of fun with it and should buy it – yes, she's a bit of an instigator and I always seem to bite! You should have seen my husband’s face when I unloaded that beauty! (I’ve yet to have ‘fun’ with it, but I’m going to get that contraption up and running and see what I can get growing over the winter -- biggest challenge will be trying to figure out which room it will look best in!) Let’s just say I think I redeemed myself with Jon when I unloaded my tool purchases this time around!
The climatorium is going to be a tough one to top!
Cheers to flea market fun everywhere!
michele.
Tuesday, September 23, 2008
tHey cAll iT cHeaTiN'
If you're having a party or taking some pictures and your container plants are looking less than stellar in the background....I have a quick fix to spruce things up and make those pathetic pots look lush again! Run around the yard and start clipping the things that are vibrant and doing well and add them to your containers. Clip vines, branches, hearty blooms (live forevers fill things out beautifully and are long lasting). We were shooting some things on our studio deck last week and a couple of my boxes had seen better days. Needless to say, they were looking pretty sad and not very photogenic. My solution was to run to the garden center and just replant, but in the meantime, my mom (who has obviously done this before) had already transformed them back into vibrant, lively containers again! Took her only a few minutes and cost us nothing! BRILLIANT!
.....and definitely worth sharing.
Cheers to a little cheatin' now and then!
michele.


Monday, September 15, 2008
thE AdVenTurE Is iN tHe bAckPacK


I admit..I sometimes come up with projects for my daughter because it also sounds like fun FOR ME! Not that I really need an excuse, but I absolutely love coming up with things for kids, especially projects that involve nature and the imagination. So, I'm always trying out different things on her, hoping to encourage playful activities that are nothing short of adventurous, imaginative and as far away from mind-numbing technology, as possible. The latest has been getting her set up with an adventure backpack. I've been wanting to put one of these together for her for quite a while now, and I think I was more excited about the whole idea of having an adventure backpack than she was. It just sounds exciting, doesn't it?! A backpack loaded up with all the cool things that make outdoor exploring the best possible experience ever. And, if you think they're just for kids, think again. I, of course had to create one for myself.... Mine just has more art supplies in it than bug collecting tools! (I'm past the whole 'grab every insect, frog or worm that I encounter' stage) They're as much fun to make, as they are to use, so whether you're young or old, with children or without, an adventure backpack should be hanging by everyone's door! Nature is very inspiring, creatively speaking and once you tap into all the amazing textures, patterns and colors that are out there, you too will start documenting, collecting and creating. Turn off the cell phone. Shut down the computer. Unplug the video games. Immerse yourself in everything the great outdoors has to offer, because an invigorating creative world awaits you and your family. Everyone will return refreshed, re-energized, relaxed and focused. It's the kind of fun most of us forget to have on a regular basis. Here's a list of ideas to get you packin': Add or subtract supplies to whatever suits you and your exploring style. Personally, I like to be ready for anything.
- lightweight backpack with lots of pockets and compartments
- journal or sketchbook
- favorite writing utensils
- small pair of scissors to trim grass, leaves or flowers
- ruler to measure insects and things
- drawstring bag or trinket box to store found treasures
- something to give you a closer look like a magnifying glass or pair of binoculars
- small garden shovel to dig with
- compact pop up screen house for bug and butterfly observation
- gloves
- flashlight
- butterfly net
- picnic size blanket
- insect repellant and sunscreen
- hand wipes
- visor and sunglasses
- healthy snacks and water bottle
- all-in-one compact pruning tool or swiss army knife
- portable flower press
- small spray bottle filled with water
- digital or disposable camera
- portable screen sifter (take a small, empty wooden picture frame and staple aluminum window screen across the front of the opening.) Fun to have if by a pond or creek.
- identification books to look up birds, plants and insects.
What's in your backpack?!
Cheers!
michele.
Wednesday, September 3, 2008
ZNE convenZioNE 2008
We returned from this extraordinary event a couple of weeks ago and our feet hit the ground running with work commitments. There’s been projects galore, shoots and writing into the wee hours, so I’m just now getting the opportunity to chat about it. Creativity is powerful and when you combine that with an incredible community of creative people, pretty amazing things happen. That’s what ZNE is all about. There’s an inspiring backstory, a fearless leader who they call the ‘queen’ and an immense group of members who support one another in all their art efforts. They’re charitable and inspiring and I was proud to be asked to be a part of it all. Chelise Stroud put her heart and soul into the event and it showed. I attended a fun workshop by a gal after my own heart, Chrysti Hydek; met remarkable people and got to see a fabulous part of the country, Pleasanton, CA. I had the pleasure of meeting the inspiring artist and author, SARK; view an incredible documentary – 1000 Journals, listen to some great tunes by their resident musician Jon Troast (a.k.a. the guy who travels around the country and will provide you with a concert in your living room), and was even able to sneak in a nature fix with a quick visit to Muir Woods. I’m all about positive, empowering interaction and support, and it was refreshing to see a community of artisans delivering just that.
Congrats to ‘bonniebluedenim’ who won the $200 spending spree and thanks to everyone who checked out our blog to get registered. We’ll be offering up another chance to win for next year’s event.
Loud and Proud Cheers to ZNE. It was a genuine pleasure meeting all of you and I look forward to the next one.
I’ve posted a slideshow below set to a kickin’ tune from our friends at Authentic Records. It’s ‘Gypsy Queen’ by Jon Peter Lewis (I, of course had to select a ‘queen’ type song – it’s also one of the songs Chad and I jammed to as we tried to make our way around Pleasanton)
(for smooth playing, be sure to let it ‘buffer’ --- whatever that means…just make sure the gray bar is way ahead of the orange bar -- if your connection is slow, keep 'rewinding' until the gray bar gains some ground and it’ll play great!) how's that for techie-talk?!
michele.
Tuesday, August 12, 2008
tUtU's AnD BuTteRfliEs


For some reason, even amongst some speckled plants with a health issue or two in the yard and garden, seeing a kaleidoscope of butterflies fluttering about makes all seem vibrant, lively and healthy. The night before last, my daughter and I noticed all of the different ones partying down on our butterfly bushes and decided the next day we were going to try our hand at capturing a few. (I had my eye on this gorgeous yellow and blue number!) So, what I thought was going to be a quick cast or two turned into a very determined, competitive challenge that lasted pretty much most of the day! They were everywhere, but they weren't staying in one place for very long! My first attempt left my daughter extremely disappointed...and the little "mini-me" all of six years swiftly took the net out of my hands and said, here, "let me do it". The best part was that she had thrown on her ballerina tutu because she thought it made her look like a flower, which would, of course attract the butterflies! Very clever. We ended up with one larger butterfly with tattered and torn wings (not from our doing, mind you...we were very careful with the net!):) The other six or seven were smaller little numbers. (The prized yellow and blue beauties continued to escape us the entire day....better luck tomorrow!) We set up camp for them in this cute butterfly bungalow which is more or less a little mesh tent (a great way for kids to observe them up close). We laid out a scrumptious buffet for our fluttering friends that included tasty flowers, leaves with drops of sugar water, and an orange slice, so they should be most content during their overnight stay. My daughter had all of these great questions that I was only able to answer after a bit of online research......where do they sleep, how long do they live, what do they eat, what flowers do they like the most, do cats like to catch them, what's the difference between a moth and a butterfly? Interesting stuff that I can say her and I now know a little bit more about. Our butterfly hunt led to an afternoon of one nature adventure after another. We built a tree fort of sorts out of branches and challenged ourselves to creating artwork to adorn the interior walls using only what we could find around us. It's the kind of fun most of us forget to have on a regular basis, yet it's the best way to recharge our creative batteries.
Cheers to chasing butterflies and refreshing playtime in the great outdoors!
michele.
Subscribe to:
Posts (Atom)