An easy, no-brainer today! So far, we've created a couple of hats and a couple of scarves out of our has-been sweater and I still have quite a bit of material left in both sleeves that sit in front of me...hmmmm.......how 'bout a couple of cuff bracelets, my friends?!! 

Clip off those cuffs, open them up, (unless you have a perfect fit right from the get go). 
Finish off the edges with a decorative hand or machine stitch. Embellish in true individual style and then stitch closed. You want it to have a snug fit and since the material stretches....size accordingly! Very cool...and Very comfortable. 


You gotta love a quickie.....wear one proudly and 'present' the other one to a very special friend! 
Cheers to what remains of this bountiful sweater....one or two more projects still to come!
michele.
Monday, January 26, 2009
reFaShiOnEd SweAtErS taKe 3
Monday, January 12, 2009
reFashIOnEd SweAteRs TakE 2


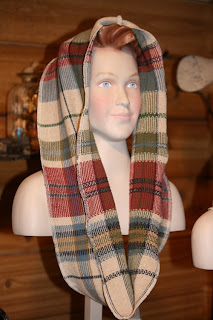
....and the sweater tear down continues. So far, we've created a couple of smashing lid covers and now, with the remaining body of the sweater and some of the sleeves I am going to gather the material needed to create a couple of scarves! Place a straight edge on your sweater and cut out equal width strips making the most efficient use of your material. I have experimented with cutting at different directions on the knit and the results were almost identical. Your thinner, cotton sweaters will sometimes have a slight 'curl' to them once cut into strips and stitched together. Other knits will lay beautifully. Every knit is different and I say, play it up with the design, because in the end they all look great...only different! 

Decide whether you want to create a full strip scarf or what I like to call the 'continuous loop' scarf, or if you have enough material...BOTH!!! 

The continuous loop style is great because it always stays in place, no possibility of 'unwinding' while you're wearing. Stitch your pieces together (I stitch 'wrong sides' together with stitch exposed topside) and finish off your edges with either a serged stitch or a decorative hand stitch with heavier thread such as embroidery floss. Embellish 'til your heart's content with buttons, tassles, appliques, etc. Wear proudly, my friends!
(My daughter just kicked me off the sewing machine and said "I really, really, really, really need to sew something"...so off I go to tend to the little pile of sweater material that's left to create the remaining goodies...hmmmmm, what could they be?! 

Cheers to thrifty, stylish, handmade wearables everywhere!
michele.
crEatiVe SouLs wHo sHarE AnD iNspIrE

My friend Chrysti Hydek is an inspiring figure who is working diligently on laying a creative path for all of you to enjoy and benefit from. A regular visit to her online hub is a must. Lately, she's been getting to the root of some of her most probing questions for people who are walking the walk of living creatively. I was her latest target and you can read all about it here (Day 16). She even gives you the opportunity to take away a little FREE creative goodness for your reading/visiting efforts! Enjoy!
cheers to creative souls everywhere!
.......positive interaction is what it's all about.
michele.
Friday, January 9, 2009
reFasHioNeD SweAtErS TaKe 1 


The sweater love fest begins with a couple of warm, wooly lid cover projects. You can start with a larger men's sweater so you have plenty of material to work with (The first few projects I share are all going to be made out of ONE sweater and in the end I believe you'll be able to creatively claim 7, that's right 7 revamped beauties), or of course you don't have to go for quantity and just work with a sweater you'd like to wear in new, unique ways!
You can work with cotton, wool, or blends. They are all just going to give you slightly different results. Main thing is that it's a well-constructed knit.
For this basic style stocking cap construction, you'll focus on the bottom of your sweater. Make sure you are using a sweater that has a decent band or enough pull that it will offer support at the base of your hat. Take a hat or two that you already have and like the fit of to use as your pattern. Create a pattern allowing for a 1/4" seam allowance all around. ***I'm a big advocate of sample runs, (when you have time) so before you cut into 'THEE' sweater, try one out of a 'junk' sweater to make sure you'll like the fit so you can make any adjustments to your pattern.***
Turn your sweater wrong-side out, making sure the bottom edges are lined up evenly. Place pattern along the bottom and cut. Stitch around outer edge. Turn right side out and wear proudly. Can embellish, if desired!
The deconstruction of the sweater continues next week, so check back!
Cheers to the sweater!
michele.
Thursday, January 8, 2009
snuGgLE uP In tHe cReaTiVE WarMTh of a SweAtEr

All this month, I'm wrapping myself up in the creative bounty of a sweater. I'm de-constructing AND re-constructing these dated knits of years past. The magic begins tomorrow so you can end your week on a warm and wooly note. Stop by for a quick grab of our first idea and have a go at things over the weekend.


